
How to Get Rid of Mold from Shower Caulking?
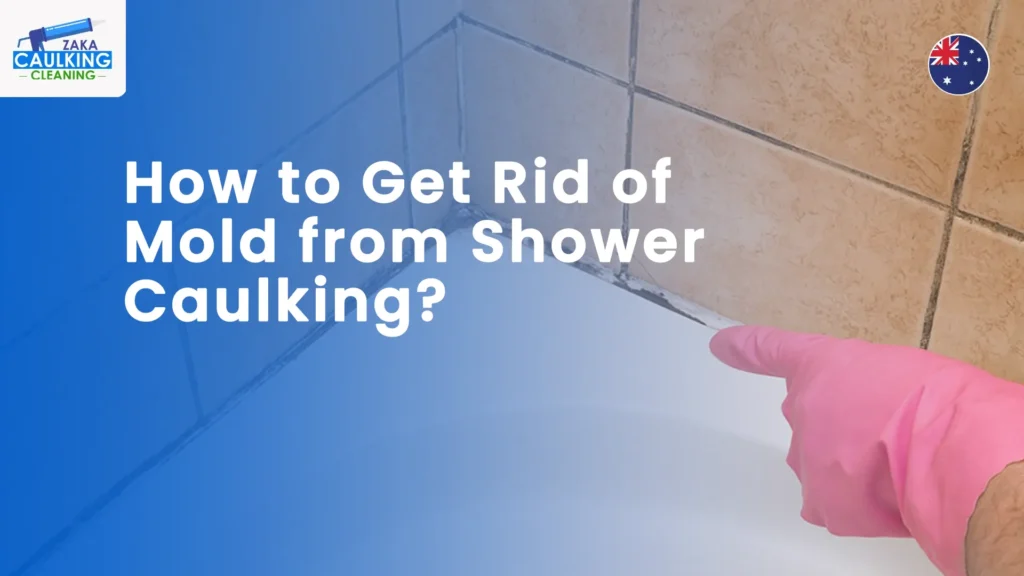
Struggling with mold on shower caulking? Learn steps to remove stubborn mold, prevent regrowth, and restore a clean bathroom. This guide covers easy DIY cleaning steps, when to replace caulk, and smart maintenance tips to stop mold before it starts.
How to Remove Silicone Caulk Step-by-Step?
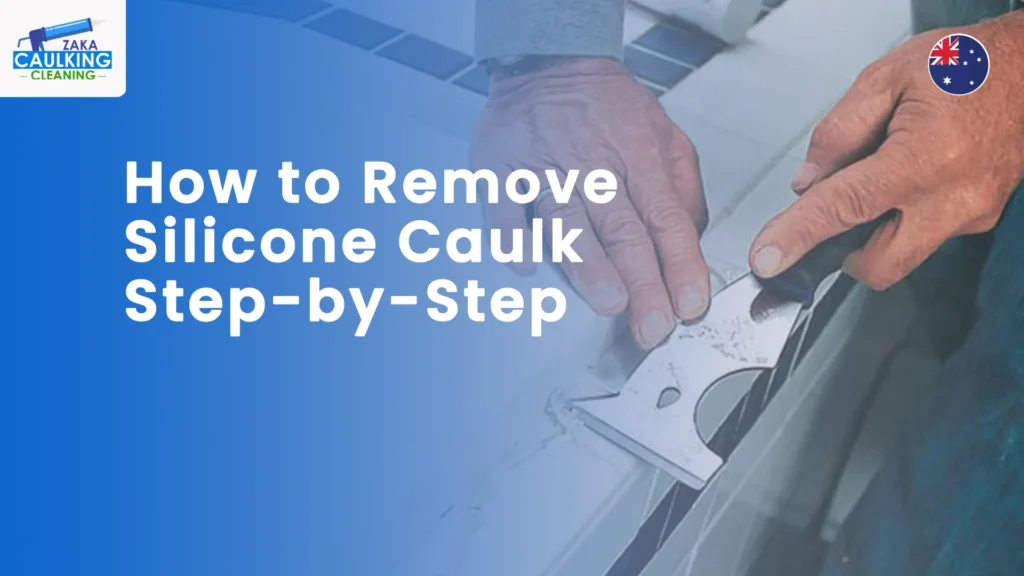
Check how to remove silicone caulk the right way with this Sydney-focused, easy guide. From softening old sealant to cleaning and prepping surfaces, uncover expert methods for fresh, mould-free, and long-lasting bathroom joints. Click to master it!
Kitchen Caulking 101: A Complete Guide for Homeowners
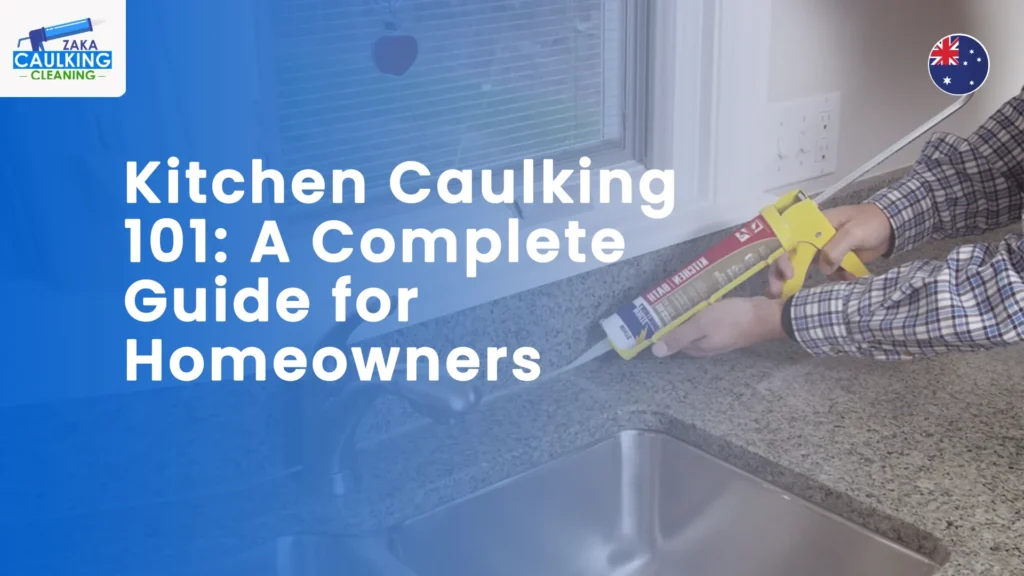
Kitchen Caulking 101: A Complete Guide for Homeowners One of the great ways to have a sleek and clean kitchen is proper kitchen caulking. Food debris and dampness in corners and crevices come up as time passes. This may lead to mold, water leaks, and spots that are hard to remove. It means caulking kitchen surfaces is crucial not just for beauty. But it will also preserve structure, longevity, and cleanliness. Further, the ability to create a waterproof defense shows the importance of proper kitchen caulking. It will seal gaps near tiles, cabinets, backsplashes, and counters. This ensures an enduring finish, keeps your surfaces clean, and stops water leaks. Moreover, a properly caulked kitchen is easier to clean and keeps its seamless and new appearance for many years. Eventually, ignoring this step can cause expensive issues. Under-counter moisture can destroy wood, loosen tiles, and increase the spread of mildew. Because they are often close to water, areas like the caulking around the kitchen sink are prone to. In the same manner, caulking kitchen tiles helps stop lifting and cracking, which are often caused by hidden dampness. If you apply quality caulking, it will improve the look and value, and also protect your kitchen. You can trust experts like Zaka Caulking and Cleaning to make sure every joint and corner is sealed properly. Let’s first learn how to caulk your kitchen every part! How to Caulk Your Kitchen? More than merely filling in gaps, kitchen caulking preserves grouting. It increases longevity and guards against water damage for a pristine and lasting finish. How Caulking Complements Grouting? When grout is not enough to reinforce your surface, caulking kitchen will help. Grout gives a solid base, but caulking lends seams and edges flexibility and safety. Step-by-Step: Clean and dry the surface Put painter’s tape on it Cut the nozzle at an angle Evenly apply caulk Smooth it out Before drying, take off the tape Sealant Comparison: Silicone: It is perfect for lasting safety and damp areas. Acrylic Latex: Not as waterproof. But easy to paint and apply. Hybrid Sealants: It is ideal for a lot of surfaces. This may cover marble, granite, tile, and laminate. Further, kitchen caulking is necessary for everyday use. This is because of this combo, which makes sure of a flexible and permeable finish. How to Caulk Kitchen Counter? Kitchen counter caulking prevents moisture and mildew. It is by sealing the spaces between the countertop and the wall. For a perfect seal, fully wash the area, apply the bead gently, and level. Silicone or hybrid sealers work well on stone or laminate. This keeps the counter strong and clean by preventing water leaks. Best Caulk for Kitchen Counter: For leak-proof sealing, use only silicone. Hybrid sealers that offer both resilience and mobility. How to Caulk Kitchen Sink? The best caulk for kitchen sink will stop leaks, stains, and mold. Take off the old caulk first. Next, clean the area safely and allow it to dry. Over the sink edge, apply an equal bead, gently rub it, and wipe up any surplus promptly. With this, a clean finish and waterproof seal are assured. Best Caulk for Kitchen Sink: 100% silicone for superior defense from moisture. Formulas that resist mildew for long-term defense. How to Caulk Kitchen Backsplash? Debris and moisture won’t seep into the joints thanks to the caulk for kitchen backsplash. For the ideal finish, rinse the areas of the wall tiles and the backsplash. Silicone works well for tiles. On the contrary, hybrid sealers are perfect for combos like stone and laminate. Best Caulk for Kitchen Backsplash: Marble and tile silicone. Hybrid resins for bonding many surfaces. How to Caulk Around Kitchen Cabinets? Gaps that trap wetness and dust will be sealed by caulking around kitchen cabinets. Use painter’s tape for fine lines. Then, carefully apply a fine bead. It is better to finish seams along the laminate or wood. This is because acrylic latex is easy to paint. Best Caulk for Kitchen Cabinets: Acrylic latex for a paintable surface and simple use. Hybrid for greater resilience in areas that are prone to dampness. How to Caulk Kitchen Tile? To stop water leaks and cracks, caulking kitchen tile and joints where tiles meet other surfaces. For a simple seal, rinse the grout lines and let them dry fully. And then, apply silicone or hybrid caulk. For a look of polish, wipe, and remove any excess. Best Caulk for Kitchen Tile: Silicone for mobility and defense from moisture. For long-term strength and pristine finish, use hybrid sealers. Maintenance Tips & Common Mistakes during Kitchen Caulking Regular care is vital to keep your kitchen caulking clean, free of harm, and enduring. You can save yourself from costly repairs later if you take care of it now. Inspecting Frequency: Check your kitchen caulk every six to twelve months. It is to make sure that it’s still in place and properly fills in any gaps. Signs of Damage: You have to examine for loose corners, black mold, or cracks. These are signs that show caulk fails and needs replacement. Common Mistakes: Caulk’s lifespan will be short if you use the wrong type. Also, skipping surface prep weakens grip, and excessive use can result in uneven lines. Pro Maintenance Tip: Keep caulked areas dry and clean at all times. As soon as you see damage, reapply to avert more serious issues. In simple words, a well-kept seal has many benefits. You must check, clean, and reapply as necessary. Timely upkeep will ensure a clear finish and long-term safety. In short, it can keep the resilience, hygiene, and safety of your area. Final Words Ultimately, a well-kept and sealed kitchen offers enduring safety in addition to visual appeal. However, mold prevention, moisture exclusion, and a smooth surface are all achieved with proper kitchen caulking. Picking the best caulk for kitchen counter ensures both longevity and a shiny look. Moreover, to avoid expensive damage and preserve cleanliness, regular checking and upkeep are crucial. Homeowners
Professional Bathroom Caulking Services: When DIY Isn’t Enough
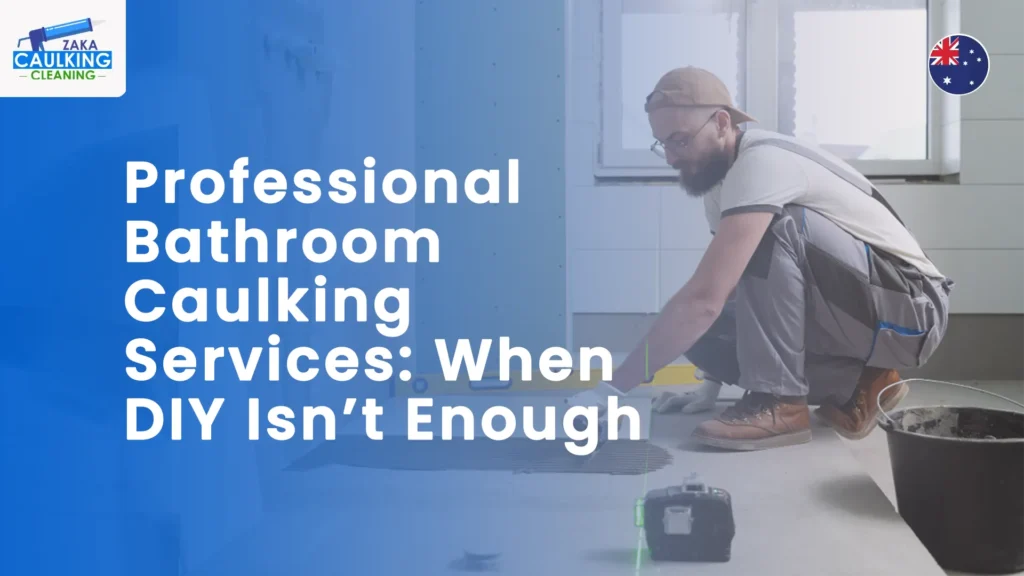
Bathroom caulking plays a crucial role in preventing leaks, mold, and structural damage. Professional sealing ensures durable protection, clean finishes, and a healthier space. With the right materials and tactics, your bathroom stays strong and waterproof.
Builders Clean Window Cost: What to Expect in 2025
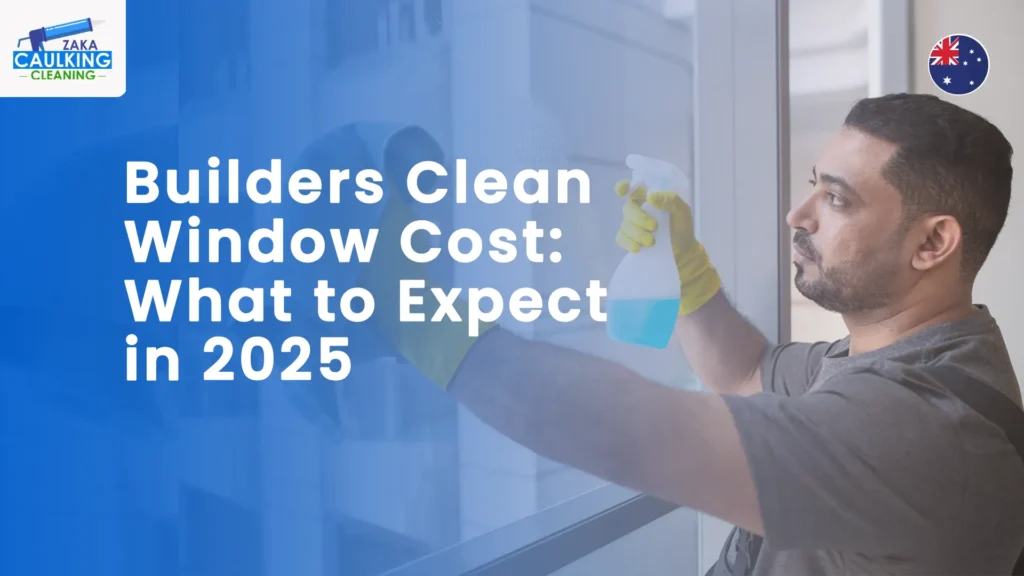
Know everything about builders clean window services in 2025. It includes cost and price factors, residential vs commercial variances, budget saving tips, and expert advice for a flawless finish. Make every window sparkle by using the best cleaning agent. Almost 87% of new construction or remodeling projects leave windows dirty with harsh construction residue. These are like paint spots, cement dust, glue marks, and dirt. If you can’t fix it, this will look ugly. Also, it may harm your glass permanently and make your place less appealing before it shines. In this case, builders clean window service will be a game-changer. As compared to regular cleaning, this is a specialist process after the construction. In this, industry-safe materials, skilled tactics, and precision tools are used to remove stubborn stains. It will make the glass free from stains and streaks, and give your flawless space back. Additionally, clean window shields your area from scratches, stains, or fading that cost you more in the future. Further, you will see in this article what to expect from the builder window clean service in 2025. It covers price ranges, cost concerns, and smart money-saving tips. No matter whether you have a large commercial project or a newly built house. Knowing the numbers early guarantees better choices and a good view. Let’s first check in detail what’s builder’s clean window is! What is a Builders Clean Window? A newly built or refurbished property must have clean and shiny glass. However, it does not deserve windows with cement, paint, or dirt. A builder’s window cleaning service assures a deep cleanup, accuracy, and a perfect finish that makes your room look new. 1. Clear Definition A builder window clean service means an expert cleaning remedy for after construction or refurbishing sites. It focuses on the removal of buildup waste that normal cleaning can’t remove. These are like paint spray spots, silicone leftover, cement stains, and glue marks. In simple words, restoring glass surfaces to their real clean look is the aim. 2. When It is Needed Usually, this service is required right after large repairs or rebuilding. Windows often come into contact with paint drips, sealants, and plaster dust while construction work is going on. Moreover, a finishing clean ensures that these wastes are safely removed prior to their hardening. These will protect the glass and provide your area with the perfect look that lasts. 3. What’s Included A full-service builders clean window package involves various things. These are silicone and paint removal, frame repair, flawless polishing, and complete glass cleanup. Additionally, experts also make sure windows are totally free and check for any residues or scratches. It will improve natural light and the property’s full appearance. Furthermore, the goal of builders’ cleanup is not only to remove dust, but also to enhance the appearance of your area. With professional care, your investment will be better secured, and your windows will shine more. Are you concerned about the window cleaning cost? If yes, the next section can clear all your doubts. Let’s check it! Average Builders Clean Window Cost Transparency is crucial when it comes to after-buildup cleaning budgeting. However, the cost of a builder’s clean window varies. These are based on the type of space, location, and project size. You can make better plans and avoid emergency surprises if you are aware of these cost trends. 1. Pricing Range Homeowners must budget between $10 and $25 per window for living houses on average. On the contrary, the average price per window for large or more complex commercial premises varies from $20 to $40. Hourly prices will range from $45 to $80, mainly for high-access or specific areas. Additionally, some companies provide project-based pricing. It means it is perfect for comprehensive after-construction packages. 2. Residential VS Commercial In general, residential work is easy, requires fewer tools, and takes less time, which lowers charges. But commercial tasks need more safety checks, high-rise access, and wider glass surfaces. Both the overall cost and the labor numbers are instantly increased by these factors. For large-scale upgrades, the extra expertise gives a more flawless and lasting finish. 3. Regional Differences The area of the property may also affect the price. For minor tasks, a builders cleaning services Melbourne starts at about $200. Meanwhile, due to more demand and labor costs, builders cleaning services Sydney are often a little expensive. Your estimate will be realistic and accurate if you take your area into account. To put it briefly, knowing the size, kind, and location of your property supports good budgeting and wise investing in quality cleanup services. Factors that Affect the Cost For good reason, not every builder offers the same prices for window cleaning services. A lot of crucial elements can affect the final cost. You may avoid last-minute surprises and make wise financial decisions if you are aware of things beforehand. The following are some of these factors that may affect the cost: Size and Number of Windows: The labor, time, and cleaning solution needs increase with the number of windows. Planning, longer schedules, and many cleaners are often required for large living houses or company facades. As scope and labor increase with each extra layer, this directly affects the cost of the builder’s clean window. Type of Glass & Access Difficulty: High-rise or unique glass requires more work to clean than basic windows. Hard-to-reach places need framework, lifts, or rope systems that increase risk and labor costs. This is why professional building cleaning crews are vital. Use of Specialized Tools or Cleaning Products: Dealing with post-buildup debris requires more than just easy fixes. It includes wastes like silicone, glue, or paint overspray. Moreover, experts use eco-safe solvents, scrapers, and modern tools to restore shine. More specialized approaches are needed for tough residues. It will affect the final cost and time to do the task. Additional Services: Add-ons like frame detailing, dent repair, or emergency window cleaning services can take the quality to a higher level than just regular
How to Choose the Right Caulking Service Near Me?
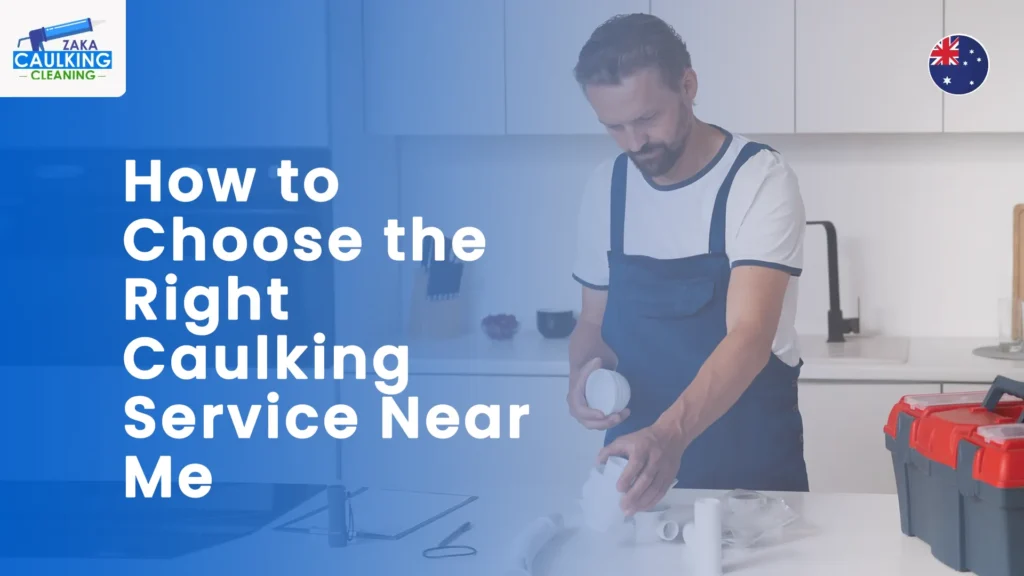
Do you want to protect the comfort of your house and stop leaks? More than just filling gaps, the right caulking service protects, beautifies, helps you save money, increases energy efficiency, and keeps your house looking perfect all year long! Do you think caulking is a small home maintenance task? But you will need to hire the best caulking service. It is to protect your property from water damage, air leakages, and energy loss. However, you will benefit from a professional seal. Due to this, your home looks clean, your interiors are safe, your energy bills are lower, and more. Sadly, a lot of people do not focus on it and end up picking an inexpert contractor. These workers use inferior materials or wrong techniques. This will result in cracks, leaks, and expensive repair work. At Zaka Caulking & Cleaning, we think that every seal ought to be long-lasting. Our professional caulking service gives clean and enduring results for all areas. We use premium materials, careful strategies, and years of experience for windows and exteriors to bathrooms and kitchens. In addition to filling up gaps, we will guard your home or business place against dampness, mold, and energy loss. In short, we make sure that each caulk line enhances the look and strength of your area. Let’s first see some signs that show you need a caulking expert service provider! Signs You Need a Caulking Service Are you unsure about whether you need to call the experts or not? Here are some signs that you must look for: 1. Cracked or Missing Caulk Your home is at risk when caulk starts to peel, crack, or vanish. It can cause humid issues, pests, and air leaks. All these things will result in more energy bills, mold, and building base damage. That’s why you must select an expert caulking service for recaulking on time. In the end, your house or place of business stays sealed and safe at a low cost. 2. Visible Mold or Mildew If you see black spots, mold, or mildew growing around window edges, bathtubs, or tiles, your caulk has probably degraded. This dampness issue may end up in bad smells and poor air quality. So, make an appointment for service of caulking to enhance hygiene, stop further growth, and bring back cleanliness. 3. Air Drafts Near Windows/Doors Do you feel cool air near doors or windows that are closed? It is a signal of caulk deterioration. The energy costs of your heating and cooling systems increase due to these air leaks. Quick draft repairs from home caulking services can improve insulation, keep constant indoor comfort, and lower your energy bills. 4. Water Seeping through Corners Signs of missing or cracked caulk are often found in soft areas. These are near corners, wet walls, or water stains. Leaks may ruin your home or office plaster, wood, and paint if not fixed quickly. You can avoid costly repairs and keep the strong base of your property by working with a professional service provider. Further, routine sealing will maintain your place clean, dry, and eco-safe. But do you know how to pick the right service for caulking? If the answer is no, then check the next section! How to Choose the Right Caulking Service? You can select the right caulking service that guarantees resilience, safety, and long-term savings. This will help you to avoid costly water damage and high energy costs. 1. Check Experience and Expertise The basis for high-quality caulking work is experience. Before picking, check how long they have been in this work and what kind of tasks they excel at. Be it internal, external, or commercial caulking. Moreover, professional caulking specialists know the correct ways for each type of surface, which guarantee better and enduring benefits. A skilled local caulking contractor, like Zaka Caulking & Cleaning, will find the issue quickly and provide clean and smooth surfaces. Further, selecting a crew with expertise will promise accuracy, longevity, and better safety from dampness, leaks, and drafts, which all of these newbie contractors sometimes ignore. 2. Ask About Caulk Materials Used The caulk type has a big impact on how long the seal lasts. High-end materials with various uses include silicone, acrylic, and polyurethane. However, silicone works best in humid areas. On the other hand, polyurethane works best outside. When hiring a local caulking service, you must always ask about the materials and their purpose. Low-cost products require more repairs and break down more quickly. Also, it will save your money up front. Our professionals at Zaka Caulking & Cleaning only apply high-quality sealants that are fit for your home. In the end, this promises versatility, resilience, and lifetime security that keeps your area utterly sealed. 3. Review Past Projects or Photos A reliable local caulking contractor needs to have a good record of happy clients. Before any promise, ask for before and after photos of the previous task to check expertise. You may also look at reviews on any local listings, like Yelp, Google Maps, and other local listings. It means you will get real data on customer service, quality, and resilience. Furthermore, there are reputable caulking professionals, such as Zaka Caulking & Cleaning are available. They prominently show their finished projects and client testimonials to prove their reliable benefits. Examining these samples will ensure that your investment will drive resilient, attractive, and robust results and help you. 4. Compare Pricing and Estimates Although cost is essential, your choice should not depend only on it. You must ask for detailed quotes that include labor, materials, and other vital charges. However, choosing the cheap caulking service is not always about saving money. Sometimes it will result in poor materials or an unskilled team. As a result, it will increase your future repair expenses. In contrast, a seasoned local caulking expert like Zaka Caulking & Cleaning offers clear pricing with no hidden charges. Keep in mind that properly applied caulking will save your money in the long run. It
The Ultimate Property Maintenance Guide

Property maintenance isn’t just about keeping things clean and functional. It’s about protecting your investment, ensuring safety, and creating a livable, stress free environment. Whether you’re a homeowner, a tenant, or a landlord, proactive maintenance can save you thousands in repairs and keep your property in top shape. At Zaka Caulking & Cleaning, we’ve seen it all from water-damaged walls that could’ve been avoided with a $5 sealant, to dangerous mould problems that spiraled out of control. This guide blends expert insights, lived experience, and industry-backed knowledge into one comprehensive resource. Why Property Maintenance Matters More Than Ever Poor property maintenance doesn’t just lead to leaks and cracks. affects your peace of mind as well as your health, safety, resale value, and legal compliance. In Australia, tenants and landlords are both legally responsible for certain aspects of upkeep, and ignoring them can land you in hot water with VCAT. Here’s why regular maintenance is critical: Prevents small issues from becoming costly disasters Ensures compliance with rental safety standards Maintains comfort and hygiene Increases property longevity and market value 10 Crucial Steps You Must Take for Proper Property Maintenance Let’s break it down into manageable, actionable steps based on monthly, seasonal, and annual needs. 1. Check for Leaks and Water Damage (Monthly) For both residential and commercial structures, water damage is a quiet killer. Leaks can occur under sinks, behind toilets, and inside walls. Signs to watch for: Musty smells Discolored walls or bubbling paint Spiking water bills One Melbourne tenant on Reddit shared how their landlord ignored a leaky pipe for weeks. It led to mould growth that forced them to vacate temporarily. A breach notice and VCAT case later, the landlord had to pay compensation. Action Step: Hire a plumber or contact Zaka Caulking & Cleaning to inspect and seal problem areas. 2. Clean and Re-caulk Wet Areas (Every 6 Months) Bathrooms and kitchens are high moisture zones prone to mould and mildew. Old or cracked caulking is a red flag. Checklist: Re-seal around bathtubs, basins, and shower trays Remove any blackened silicone Use mould resistant caulk Internal Tip: Our team uses commercial-grade sealants that outperform DIY products by up to 3x in durability. 3. Test Smoke Alarms and Safety Devices (Quarterly) Stay compliant and safe: Check smoke detectors Inspect fire extinguishers and fire blankets Replace batteries every 6 months or see Fire Safety in Rental Properties – Vic Government 4. Inspect Heating, Cooling & Ventilation Systems (Seasonally) Blocked or poorly maintained HVAC systems can: Reduce air quality Increase energy bills Cause breakdowns during heatwaves or cold snaps Schedule bi-annual inspections and clean filters every 3 months. 5. Maintain Roofing and Gutters (Annually) Water pooling, leaks, and even foundation damage are caused by clogged gutters. Checklist: Clean gutters every autumn and spring Inspect for cracked tiles or rusty sheets Ensure water flows away from the property Pro Tip: Installing gutter guards reduces long-term cleaning needs. 6. Keep an Eye on Pests (Quarterly) Termites and rodents cause extensive damage if left unchecked. Watch for: Sawdust near woodwork Droppings in cupboards Gnawed wires Seal entry points and consider annual pest control services. 7. Check Plumbing Fixtures and Water Pressure (Monthly) Poor water pressure and dripping taps could be signs of leaks or pipe deterioration. Do-it-yourself Tip: Check your meter and shut off the main water supply. You have a concealed leak if it moves. 8. Monitor Paint, Grout, and Silicone (Annually) Aesthetic issues often signal deeper problems: Bubbling or peeling paint → rising damp Discoloured grout → mould risk Cracked silicone → leaks Touch up as needed to protect underlying structures. 9. Secure Windows, Doors, and Locks (Bi-Annually) Safety and insulation depend on tightly sealed windows and functioning locks. Checklist: Repaint timber frames Replace weatherstripping Lubricate hinges and deadbolts 10. Conduct a Full Property Audit (Annually) Use this time to: Check insulation Inspect flooring Review utility bills for anomalies Revisit your property insurance Need help with a full property cleaning or sealing audit? Contact us now. Final Thoughts Proactive property maintenance isn’t a luxury—it’s a necessity. From small fixes like replacing caulk to big-ticket items like roof repairs, staying on top of upkeep protects your health, safety, and finances. At Zaka Caulking & Cleaning, we specialize in internal and external caulking, builders cleans, and post-renovation services. Our team brings expert care and a human touch to every job. Don’t wait for damage to get worse. Schedule a consultation right now to safeguard your most important assets. Table: Maintenance Checklist Summary Task Frequency Who Handles It Leak Checks Monthly Tenant/Homeowner Caulking 6 Months Pro (Zaka Caulking) HVAC Inspection Bi-Annually Licensed Technician Roof & Gutters Annually Homeowner/Pro Pest Control Quarterly Licensed Pest Tech FAQs About Property Maintenance: Q: In a rental, who is in charge of maintaining the property? Landlords are generally responsible for structural and safety issues, while tenants handle daily cleaning and minor maintenance. Q: What is considered urgent maintenance? According to Consumer Affairs Victoria, urgent repairs include burst pipes, broken toilets, or no hot water. Q: How often should a property be professionally inspected? At least once a year. High-risk areas like roofs and plumbing benefit from seasonal check-ins. Q: Can tenants carry out repairs themselves? In most cases, no. particularly if it calls for structural, electrical, or plumbing work. Always seek written permission.
How Caulking Services Can Protect Your Home
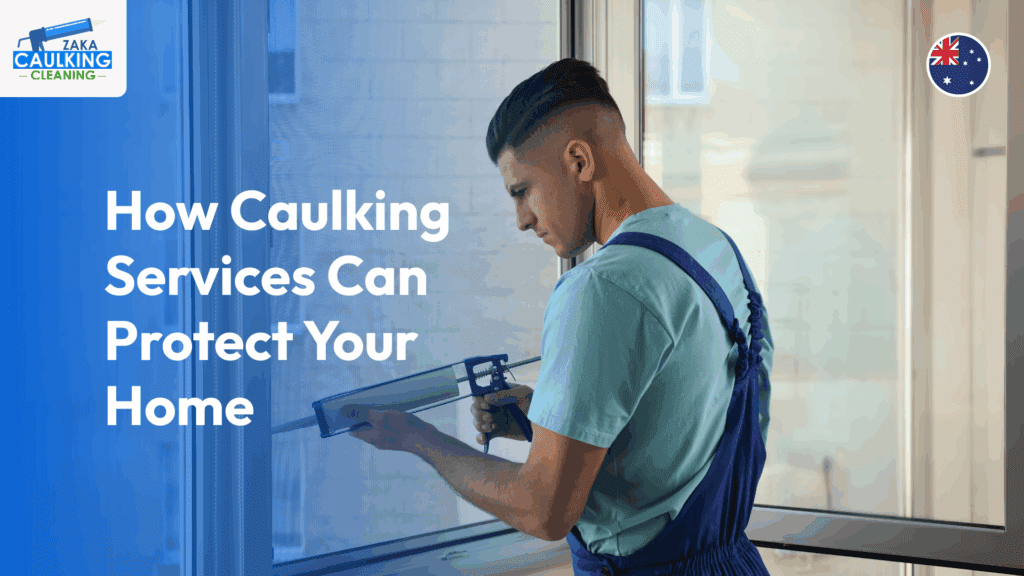
Caulking is an often-overlooked yet critical aspect of home and commercial property maintenance. It serves as a protective barrier that can prevent long-term repairs costing business and house owners thousands of dollars. Whether it’s preventing water damage, boosting energy efficiency, or enhancing the structural integrity of your property, caulking services play a crucial role in safeguarding your investment. In this guide, we will explore how professional caulking services can protect your home and save you money. We’ll find multiple benefits of energy-efficient caulking, waterproofing with caulk, and the long-term cost savings you can expect when investing in these services. Let’s break down why proper caulking should be a priority for every property owner. What is Caulking? A Quick Overview Caulking is the process of sealing gaps, cracks, and joints around your home or business. This is done using a specialized sealant, typically silicone, acrylic, or polyurethane caulk, depending on the area of application. For instance, silicone caulk is often used in bathrooms due to its moisture-resistant properties, while polyurethane caulk is perfect for exterior weatherproofing. Despite its importance, many homeowners and businesses overlook regular caulking maintenance. Proper caulking ensures that your building remains energy-efficient, protected from water damage, and structurally sound, ultimately reducing the risk of costly repairs in the future. Caulking services are essential for maintaining the integrity of your property and avoiding major issues down the line. The Primary Benefits of Caulking Services Caulking provides numerous benefits for your home and business, especially in terms of cost savings and maintenance. Here are the primary benefits that caulking services can provide: 1. Energy Efficiency: How Sealing Gaps Saves You on Heating and Cooling Costs One of the most significant benefits of proper caulking is its ability to improve energy efficiency. Small gaps and cracks around windows, doors, and walls can cause drafts, making it harder to maintain a comfortable indoor temperature. These air leaks force your heating and cooling systems to work harder, leading to higher energy consumption and increased utility bills. By sealing these gaps with high-quality caulk, you can ensure that your home or business stays comfortable year-round. Energy-efficient caulking helps reduce the strain on your HVAC system, leading to lower monthly energy costs and a more stable indoor climate. 2. Water Damage Prevention: Protecting Your Property from Costly Repairs Water damage is one of the most expensive issues property owners face. Even small cracks and gaps can allow water to seep in, potentially leading to mold growth, foundation deterioration, and wood rot. Regular caulking services can prevent these issues by creating a waterproof barrier around vulnerable areas like windows, doors, and bathrooms. Waterproofing with caulk is essential to protect your property in climates with heavy rainfall or fluctuating temperatures. By investing in professional caulking services, you avoid costly water damage repairs that could run into thousands of dollars. 3. Pest Control: How Caulking Prevents Infestations Caulking also acts as a protective barrier against pests. Insects, rodents, and other unwanted visitors can slip through the smallest cracks in your walls or floors. Caulking these openings helps keep pests out, preventing the need for costly pest control services. Sealing cracks and gaps with caulk also reduces the chances of mold and mildew growth, which can be exacerbated by moisture and attract pests. This is an often-overlooked benefit, but it’s vital for maintaining a healthy and safe environment. Long-Term Cost Savings with Caulking 1. Reducing Energy Bills: How Sealing Gaps and Cracks Leads to Big Savings Investing in professional caulking services has an immediate impact on your energy savings. If left untreated, small air leaks can lead to higher heating and cooling costs as your HVAC system works overtime. Sealing those gaps with high-energy efficiency caulking ensures that your property remains well-insulated, reducing the need for constant temperature adjustments. Homeowners can save up to 10% on energy costs annually by sealing air leaks and improving their property’s insulation. For commercial properties, the savings can be even more significant, making caulking for energy savings an essential service. 2. Preventing Expensive Water Damage Repairs The cost of waterproofing with caulk far outweighs the cost of dealing with water damage. By sealing cracks in your property’s exterior, you’re preventing mold, mildew, and foundation problems that can be expensive to fix. Addressing these issues early with professional caulking services can save you from major repair costs down the road. Whether it’s keeping your bathroom mold-free or ensuring that your windows are sealed against rain, caulking acts as an insurance policy against some of the most costly types of property damage. 3. Minimizing Pest Infestations and Health Hazards Proper caulking is a simple and affordable way to protect your property from pests and the health risks associated with infestations. Sealing cracks with caulk prevents pests such as termites, ants, and rodents from entering your home or business. Additionally, it helps maintain indoor air quality by reducing moisture buildup, which can lead to respiratory issues due to mold growth. Investing in caulking services for pest control helps prevent health risks and keeps your property free of insects, saving you on both pest control and potential health-related repair bills. Why Professional Caulking Services Matter While DIY caulking may seem like an easy fix, Professional caulking services offer several advantages that can save you time, money, and headaches. Here are some reasons why hiring a professional is worthwhile: 1. Expert Application and Material Selection Professional caulkers have the expertise to apply caulk correctly, ensuring that every gap and crack is sealed effectively. They also know which caulking material is best for different surfaces—whether it’s silicone, polyurethane, or acrylic. Using the right material ensures a long-lasting seal that performs well under various weather conditions. 2. Efficiency and Quality Professional services guarantee a high-quality result that lasts longer and provides better protection. High-quality caulking ensures that your property is adequately sealed, preventing future damage and reducing maintenance costs. 3. Longer Lasting Results Unlike DIY caulking, professional caulking comes with a warranty and is applied by experts who ensure the
how to fix poor caulking Job and Prevent Future Problems
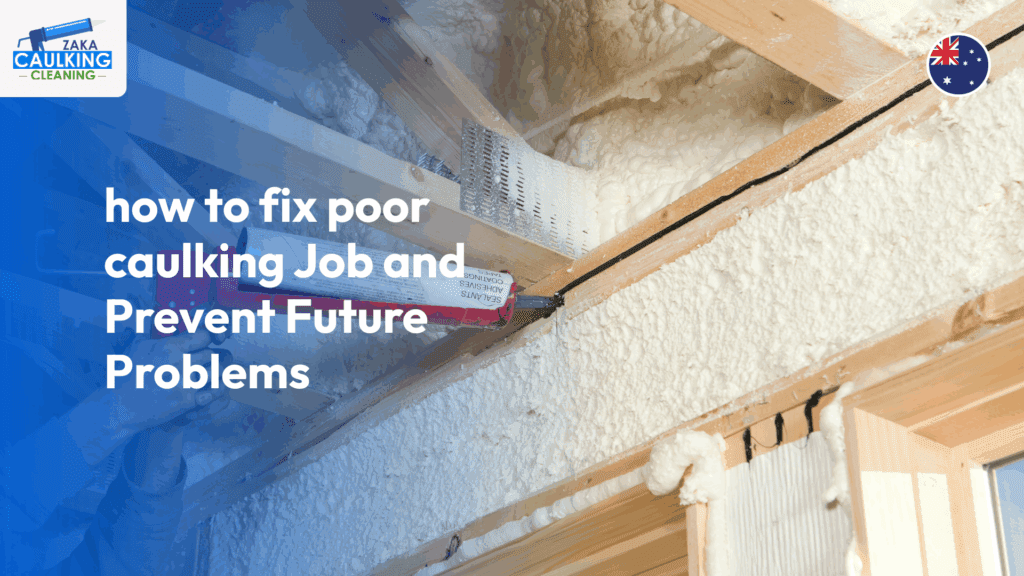
When it comes to maintaining your home, poor caulking can lead to more issues than you realize. From water damage to mold growth, bad caulk jobs can cause long-term problems that are costly to repair. Fortunately, learning how to fix poor caulking isn’t difficult! In this article, we’ll walk you through simple steps to correct bad caulking, ensuring your home stays safe, dry, and beautiful for years to come. Whether you’re dealing with gaps around your windows, moldy bathroom caulking, or cracks in your kitchen, these steps are designed to help you achieve a professional caulking job on your own. Let’s dive into the essentials of fixing poor caulking and learn how to prevent future issues. What is Caulk and Why is It Important? Before we get into how to fix poor caulking, let’s briefly go over what caulk is and why it’s so important in home maintenance. The joints and spaces surrounding windows, doors, baseboards, bathtubs, and sinks are sealed with caulk, a flexible, waterproof substance. It’s a critical element in preventing moisture infiltration, which can lead to mold, mildew, and water damage. When properly placed, caulk increases insulation and energy efficiency in addition to your home’s aesthetic appeal. Signs You Have a Poor Caulking Job Knowing when you have a bad caulking job is the first step toward fixing it. Here are some key signs: Peeling, Cracks, and Gaps: It’s time to replace the caulk if you see any obvious cracks or gaps. Mold and mildew: Especially in bathrooms, mold under caulk is a prevalent problem. If you see black spots or smell dampness, it’s a sign that the caulk is failing. Water Damage: Leaking water around caulked areas can cause paint to peel or surfaces to rot. Aesthetic Problems: Lumpy, uneven caulk lines are not only unattractive but can also cause sealing issues. Tools and Materials Needed for Fixing Poor Caulking Jobs Before you start, make sure you have all the tools and materials you’ll need. Here’s what you’ll need: Tool/Material Purpose Caulking Gun For the controlled application of caulk Caulk Removal Tool (or putty knife) For removing old, damaged caulk from surfaces Painter’s Tape To prevent too much caulk from covering surfaces and to provide crisp lines High-Quality Caulk Silicone for wet areas (bathrooms) and latex for general sealing Cleaning Supplies Diluted bleach for removing mold and mildew Smoothing Tool (or wet finger) For smoothing caulk into a neat, concave bead Steps on – How to Fix Poor Caulking Step 1: Remove Old Caulk To fix a bad caulk job, start by removing the old caulk. Using a caulk removal tool or a putty knife, carefully scrape the caulk from the surface. To guarantee a clean surface for reapplication, be sure to scrape off any remaining caulk. Step 2: Clean the Surface Thoroughly Clean the surface after removing the old caulk. If you have mold or mildew under caulk, use a diluted bleach solution to remove it. Allow the surface to dry completely before moving on to the next stage. Step 3: Apply Painter’s Tape for Clean Lines Painter’s tape should be used along both caulk line edges for a neat, professional finish. This will help prevent any messy application and create a sharp edge. Step 4: Apply New Caulk Now, it’s time to apply fresh caulk. Cut the tip of your premium caulk at a 45-degree angle after inserting it into the caulking gun. Holding the caulking gun at a steady angle, apply the caulk in a continuous bead. Make sure you apply enough caulk to fill the gap completely, but not so much that it overflows. Step 5: Smooth the Caulk After applying the caulk, smooth it with your finger or a smoothing instrument. This helps create a nice, concave line and ensures proper adhesion. Step 6: Remove Painter’s Tape Before the caulk has a chance to cure, remove the painter’s tape. This will give you clean, sharp lines without any messy edges. Step 7: Let the Caulk Cure Allow the caulk to dry for a minimum of 24 hours before exposing it to moisture. Before the caulk has a chance to cure, remove the painter’s tape. To get the precise curing times, consult the manufacturer’s instructions. Common Caulking Mistakes to Avoid To avoid another poor caulking job, be mindful of these common mistakes: Using Poor-Quality Caulk: Low-quality caulk is more likely to shrink and crack. Not Cleaning the Surface Properly: Always ensure the surface is clean and dry before applying caulk. Over-Applying Caulk: Too much caulk can result in a messy, uneven finish. Not Smoothing the Caulk: A smooth, concave line is essential for both appearance and effectiveness. How to Fix Poor Caulking That Has Mold or Mildew If you’ve noticed mold or mildew growing under your caulk, it’s essential to address it properly: Remove the Old Caulk: Start by removing the caulk as discussed in Step 1. Clean the Area: Use a bleach solution to remove mold or mildew. Allow the area to dry completely. Re-Caulk the Area: Apply mildew-resistant caulk to ensure that the mold doesn’t return. Preventing Future Caulking Issues Once you’ve fixed your poor caulking job, here’s how to prevent future issues: Regular Inspection: Check your caulking every few months for signs of wear or mold. Use Mold-Resistant Caulk: Especially in high-moisture areas like bathrooms and kitchens. Maintain Clean Surfaces: Keep caulked areas dry and free of debris to prolong the caulk’s lifespan. Need Professional Help with Caulking Repairs? If you find that your caulking job needs professional help or you don’t have the time to tackle the repair yourself, visit https://zakacaulkingcleaning.com.au/ for expert assistance. Our team of professionals is experienced in providing high-quality caulking services that last. From residential to commercial properties, we ensure your home remains sealed and protected. Learn More About Caulk Types and Best Practices Want to dive deeper into different caulk types and where to use them? Here’s a helpful guide: 👉 Caulking 101: Everything You Need to Know Before You Start 👉 How to
How to Choose Caulk and Sealant Like a Pro
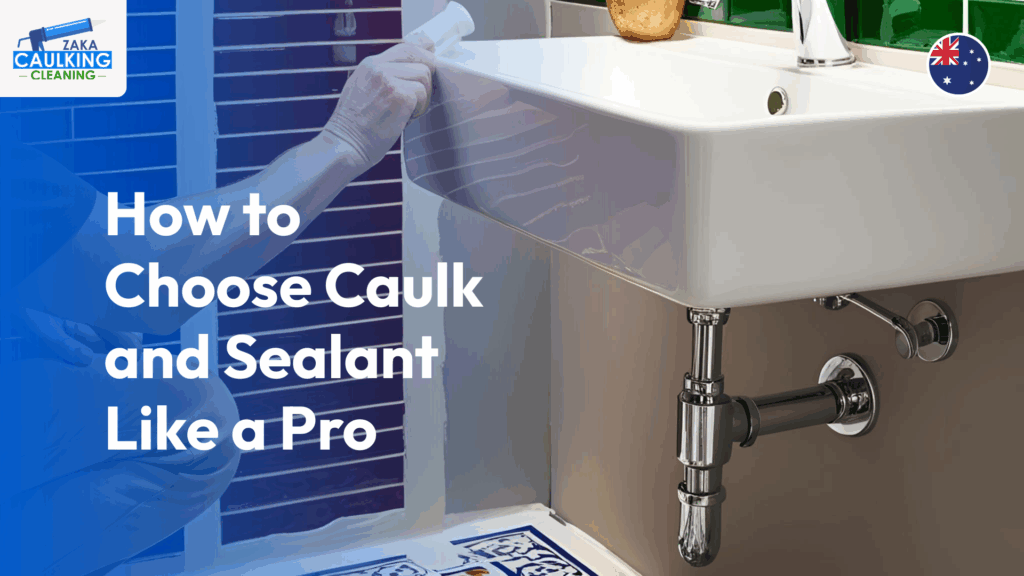
Choosing the right caulk and sealant for your home projects can seem like a daunting task, especially with so many options available on the market. I remember when I first started my DIY projects; I felt overwhelmed just looking at the vast selection of caulk and sealant options in the store. Whether you’re tackling a bathroom renovation, sealing windows, or finishing a kitchen project, the right caulking material can make all the difference. This guide will walk you through how to choose caulk and sealant like a pro for perfect home projects. By understanding the differences, types, and key factors to consider, you’ll be able to make an informed decision and achieve professional-quality results every time. What is Caulk and Sealant? Before diving into how to choose the right materials, it’s essential to understand the difference between caulk and sealant, as these terms are often used interchangeably but serve distinct purposes. Caulk vs. Sealant: The Key Differences Feature Caulk Sealant Material Typically made of latex or acrylic Typically made of silicone or polyurethane Flexibility More inflexible and susceptible to contracting Extremely adaptable, capable of expanding and contracting in response to temperature fluctuations Water Resistance Water resistance that is moderate Excellent water resistance, perfect for places with a lot of moisture Applications Best for interior projects like trim, baseboards, and countertops Best for areas exposed to moisture such as bathrooms, kitchens, and windows Durability Less durable in high-moisture environments Extremely durable and long-lasting in wet or outdoor conditions Ease of Application Easier to apply and clean, dries faster Requires more precision, but provides a long-lasting seal Paintability Can be painted once cured Typically not paintable unless specified I can very clearly recall my bathroom’s initial application of silicone sealer. I had no idea it was so flexible, and after learning how it expands and contracts with temperature changes, I felt much more confident about my next sealing job. This personal learning experience really helped me understand that caulk and sealant are both useful but serve different roles in various home improvement projects. You can choose between caulk and sealant for your job by being aware of these distinctions. Choosing the Best Caulking Material for Your Project Now that you understand the differences, it’s time to choose the right caulk or sealant based on your specific project needs. Consider the following crucial points: Assessing the Environment Is your project exposed to moisture or high temperatures? For example, bathrooms and kitchens require waterproof sealants to prevent leaks. Areas exposed to direct sunlight or fluctuating temperatures, like exterior windows and doors, benefit from UV-resistant and flexible sealants. Interior vs. Exterior Applications When sealing interior projects, acrylic latex caulk works well for areas that won’t be exposed to significant moisture. For exterior applications, you need something more durable and weather-resistant, like polyurethane or 100%-silicone sealant. Mold and Mildew Resistance To stop mold from growing in high-moisture areas like kitchens and bathrooms, use caulks and sealants that are resistant to mildew. Products like silicone sealants are ideal for these environments due to their water resistance and mold-inhibiting properties. Types of Caulk and Sealants Caulks and sealants come in a variety of forms, each intended for a particular use. Here’s a breakdown: Acrylic Latex Caulk This kind of caulk is perfect for use indoors. It is ideal for caulking crown molding, baseboards, and trim since it is paintable and simple to use. However, it offers only moderate water resistance, so it’s not suitable for areas exposed to frequent moisture. Silicone Caulk Known for its superior water resistance and elasticity, silicone caulk is perfect for wet areas like bathrooms, sinks, and bathtubs. It provides a long-lasting, flexible seal, making it the best choice for high-moisture environments. Polyurethane Sealant This type of sealant is extremely durable and weather-resistant, making it ideal for exterior applications. It’s perfect for sealing joints in wood, stone, or metal, and can withstand harsh conditions such as rain, snow, and UV exposure. Hybrid Caulk (Siliconized Acrylic Latex) The greatest features of silicone and acrylic latex are combined in this multipurpose caulk. It offers the ease of use and paintability of latex combined with the flexibility and waterproofing of silicone. It’s ideal for a variety of indoor and outdoor projects, including bathtubs, shower surrounds, and window drafts. How to Apply Caulk and Sealant Like a Pro Applying caulk and sealant like a pro is all about precision and technique. Follow these simple steps: Prep the Area: Clean the surface by removing dirt and old caulking residue. Use a utility knife to scrape off any remnants, then wipe the area with a clean rag. Mask the Gap: Apply painter’s tape to both sides of the gap if you want a clean line. Cut the Nozzle: Make sure the caulk tube nozzle is somewhat broader than the opening you wish to fill by cutting it at a 45-degree angle. Apply the Caulk: Use a caulking gun to apply a steady bead of sealant or caulk along the gap. If applying by hand, squeeze gently to maintain control. Smooth the Bead: Make sure the caulk covers the space evenly by smoothing the bead with your finger or a smoothing tool. Wait for Curing: Before exposing the caulk or sealant to moisture, let it cure completely. While certain varieties of silicone sealants may take longer to cure, the majority do so in a day. Common Mistakes to Avoid When Using Caulk and Sealant When working with caulk and sealant, here are a few common mistakes to avoid: Using the wrong material: Always match the type of caulk or sealant to the environment. For instance, avoid using latex caulk in damp locations. Not cleaning the surface properly: Caulk won’t adhere properly to dirty or old surfaces. Clean thoroughly before applying. Overfilling or underfilling gaps: Apply an even bead of sealant or caulk, filling the gap completely without overfilling. How to Extend the Lifespan of Your Sealant To ensure your sealant lasts longer: Inspect regularly: Look for cracks or shrinkage that